Obviously it goes without saying, but proceed at your own risk. You take the responsibility when you choose to code your car.
That said, I have wanted to change the ambient lighting in my vehicle for a while but didnt have the time until recently to dig. After spending some time in the code and looking at what the G20 guys have been able to do, I was able to decode the color scheme for the G05 and change the colors and combination of colors on my truck.
This can be done with Bimmercode. Unfortunately, I havent figured out how to change the i-drive labels, so you would need to remember the combos.
Specifically, I wanted to get rid of the bronze colors because I hate them and turn that category red. I also wanted to create a ///M scheme with red/blue combo and the reverse blue/red. The color scheme unfortunately is different on the G05 versus other models, so it took some trial and error to make it work. Anyway, here is how you do it.
1. How to change the stock colors of ambient lighting.
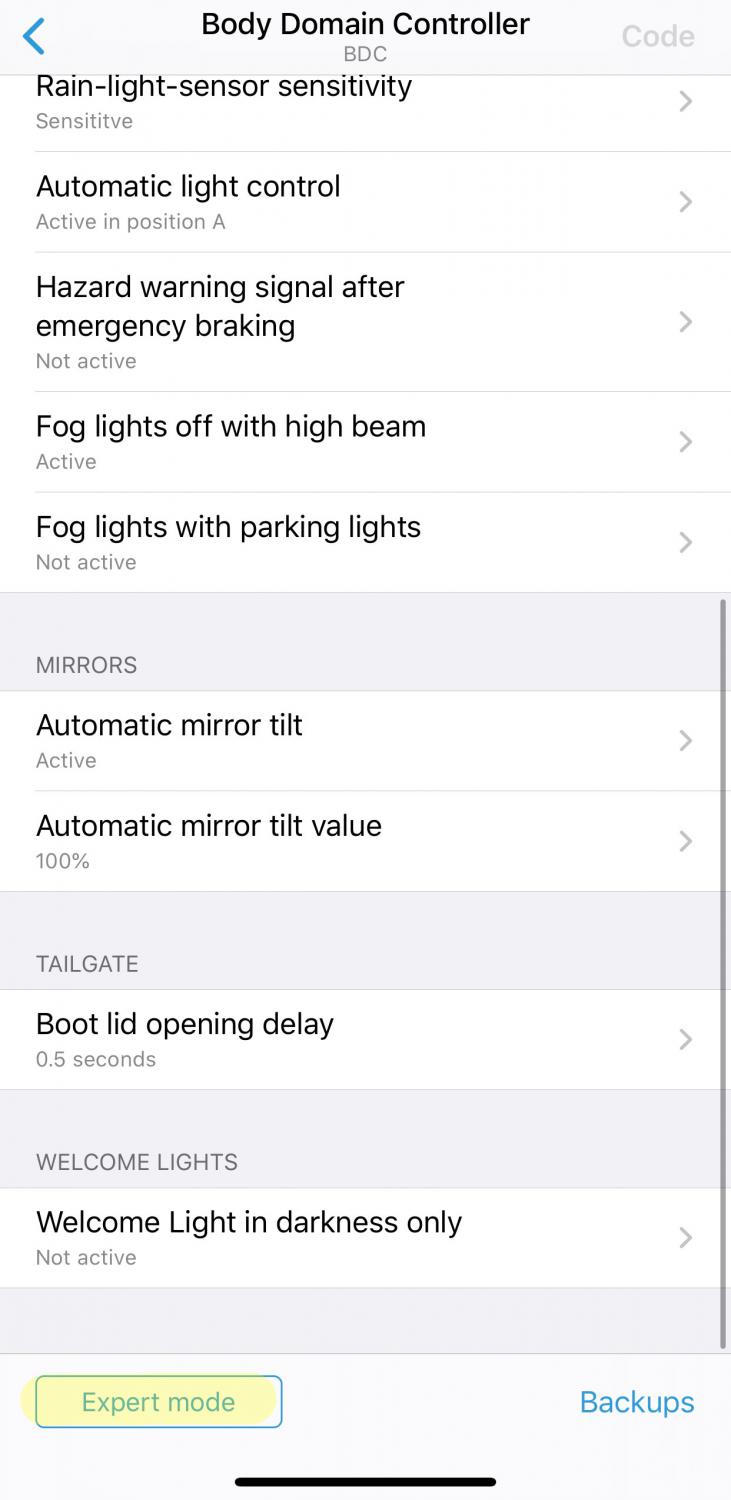
Start Bimmercode as usual and enter the BDC controller. This is a big module so it can take a little while to load.
Next, enter
Expert Mode at the bottom of the app. This will give you access to the needed areas of the module.
You first will enter the
360A LicLciColorLibrary.
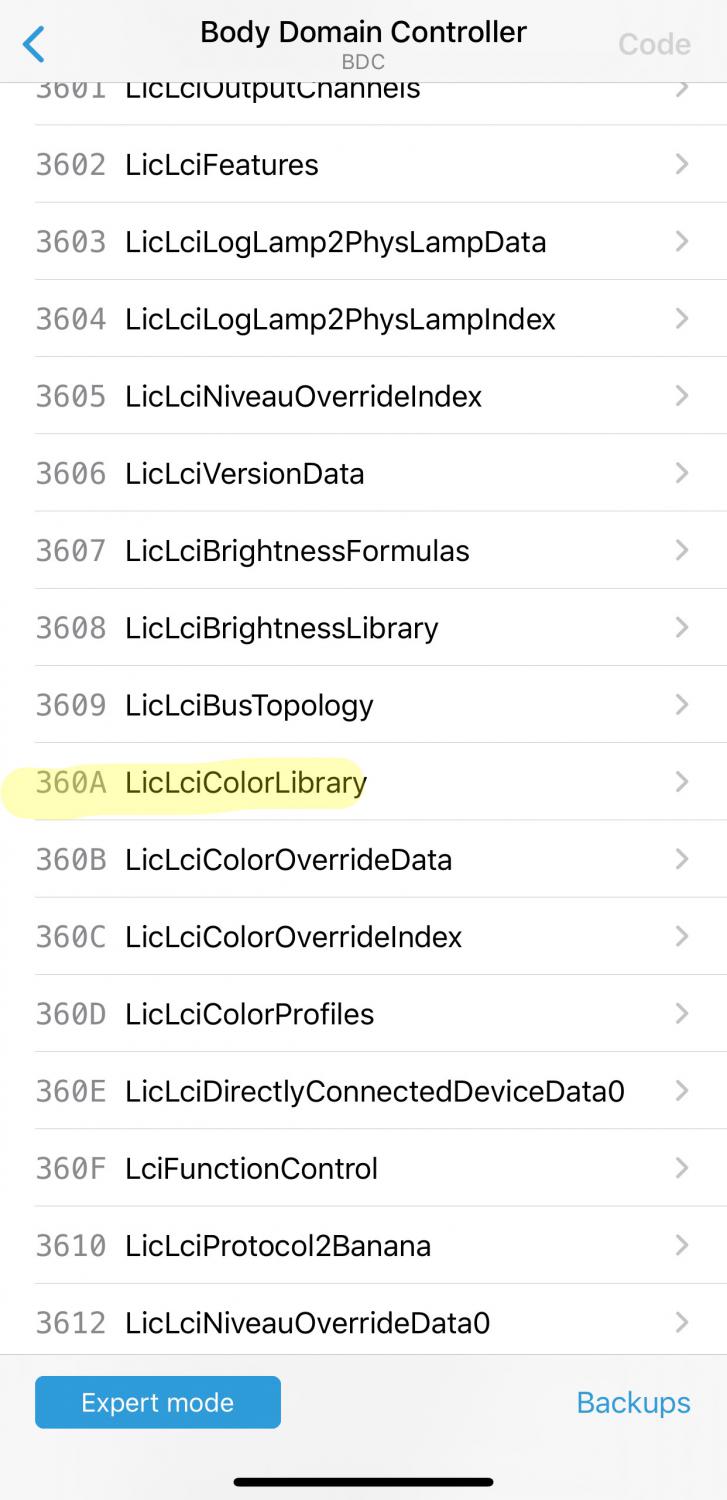
Then click the
LIC_LCI_COLOR_LIBRARY_DATA folder.

Navigate to the
GO5G06_Lichtpaket_code1 packet. Note, this should have a check next to it. Highlight it and click the custom values down bottom to enter into the bytes section that needs to be modified.

The original RGB HEX code for our trucks are the same as all other vehicles. This is how the stock colors are listed.
White - 90, E0, 90
Bronze - D7, 6E, 14
Orange - 93, 1A, 01
Blue - 00, 20, FE
Green - 10, FE, 32
Lilac - 78, 3C, FE
Remember, I wanted to add red, so we need to know that RGB HEX code:
Red - FE, 00, 00
Since I wanted to change the bronze to red, I replaced the bronze values at bytes 33, 34, 35 then 38, 39, 40 and finally 43, 44, 45 to red. That means the D7 value is changed to FE, the 6E is changed to 00, and the 14 is changed to 00.
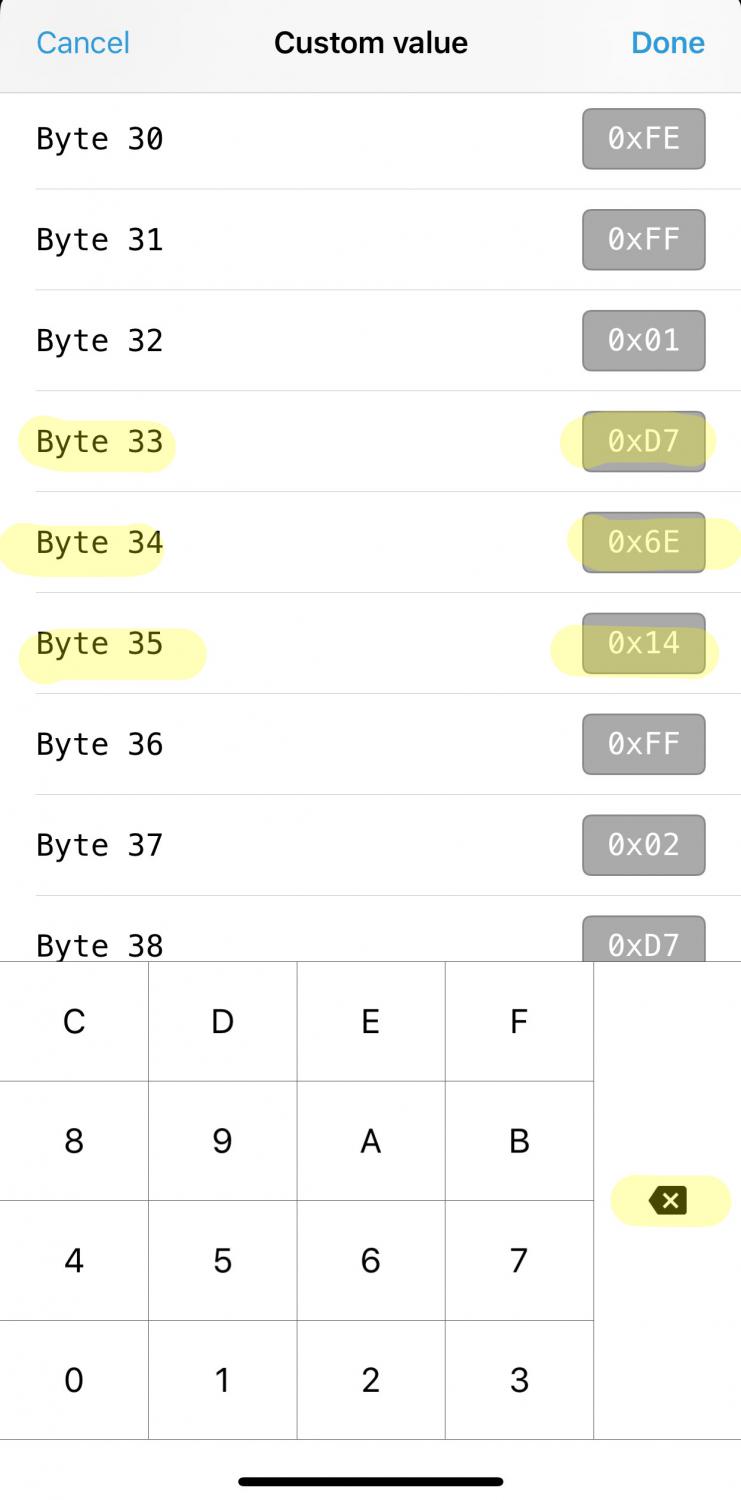


One trick that you need to know is that you click the value you want to change, then hit the backspace button on the ykeyboard down bottom then enter the new value. Basically what you did is change bronze to red. Obviously this practice can work with any color you want to replace as long as you know the new RGB HEX code.
Once those values are changed, you are ready to move on to assigning colors to the menu.
2. Changing what ambient light combo the idrive menu will activate.
Once the new colors are assigned, you find yourself back in the prior menu that is BDC Module -> Expert Coding. From here, enter the
360DLicLciColorProfiles file.

Navigate to the
LIC_LCI_COLOR_PROFILES_DATA folder.

The file you will be editing is the
G05G06_Lichtpaket_code1 which should already be selected. If not, select it and go to the bottom and click custom value.
This actually got a bit complicated for me because the G05/6 color assignments are different than the G20. After a lot of trial and error, here is what I found each assignment means...
00 - White
01 - Blue
02 - Bronze (now red for me)
03 - Orange
04 - Green
05 - Lilac
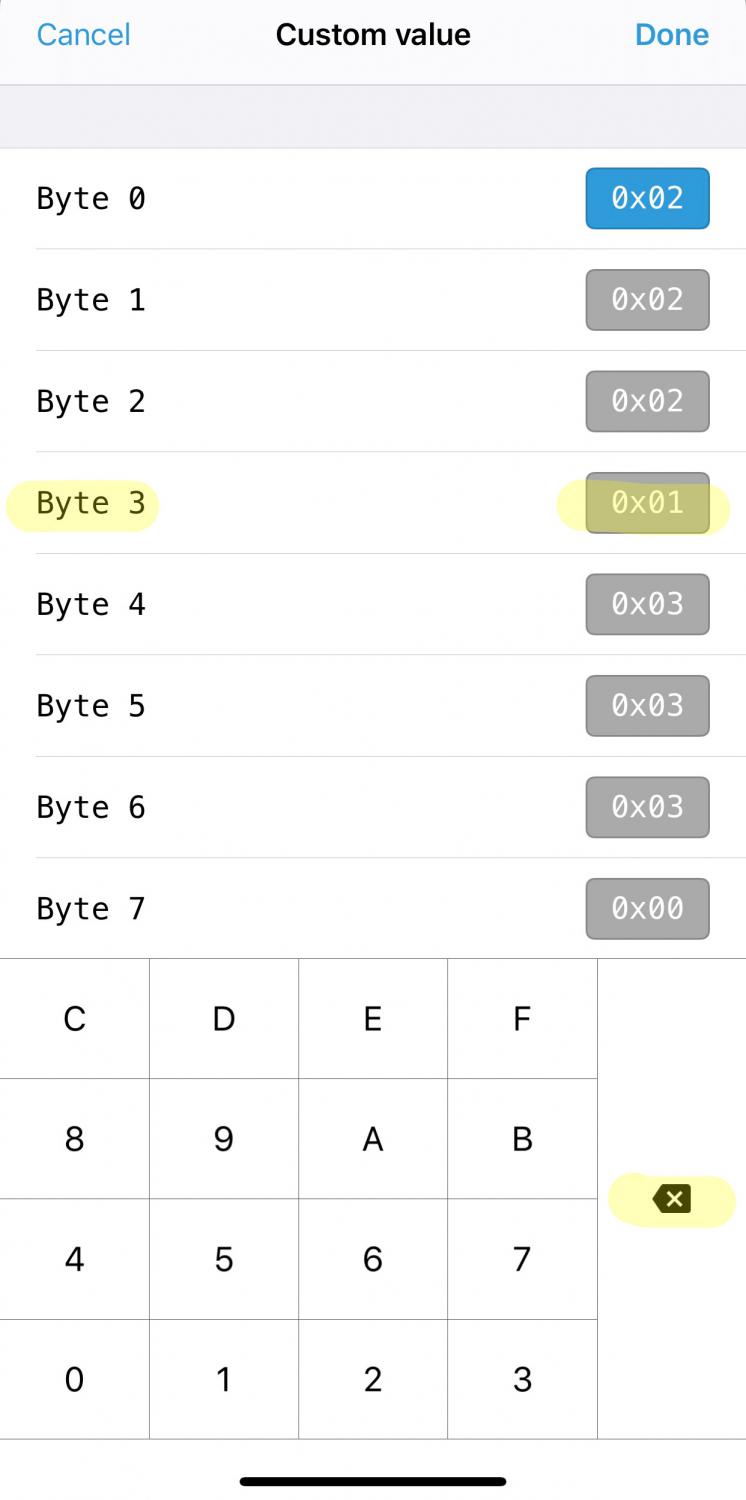
You can go through each byte and see the combos that the i-drive is displaying. Example... byte 0 is displaying Bronze on the bottom of the dash and byte 1 is displaying Bronze on the top of the dash. Since I already changed those colors to red in step 1, those now will show red ambient lighting.
I wanted to create a custom ///M red/blue and blue/red so I chose to assign the bronze/white and green/white for these. If you choose to do that, then change byte 3 from 00 to 01 creating a blue over red look.
To create the red over blue look in the Green/White I-drive menu item, change byte 16 from 04 to 01 and byte 17 from 00 to 02.

Now you are ready to code everything. Once you code it, all the changes will take. Bronze menu items will now all show red ambient lightning, bronze/white will show a blue over red, and green/white will display red over blue.
Results:
 The work is very easy and will apply to any colors you want to assign. Again, work at your own risk.
EDIT: Updated HTML hex code for red to avoid a BMW glitch.
*Note... for anyone creating custom colors, you should not use any HTML hex code with the value FF. Substitute FE for the FF part of the HTML hex code and it will look exactly the same but wont affect the overhead splash LEDs that shine on the shifter area.