| 06-01-2020, 07:29 PM | #1 |
|
Private
 
56
Rep 57
Posts |
Black X6 DIY paint correction + ceramic coating
Hi all, we just took delivery of my wife's X6 a few weeks ago and I'd like to share my experience polishing and coating the car. I've done some paint corrections as a hobby before, but this is my first time coating a car.
Here's the spec - 2020 X6 40i - Black Sapphire Metallic - Tacora Red/Black Perforated Vernasca - Premium Enhanced Package - M Sport Brakes - High-Gloss Black Kidney Grille - Sky Lounge Panoramic Glass Sunroof - 22inch M Lt/Aly Wheels, Double-Spoke 742 M A huge shout out to my awesome sales associate Ben Hui from BMW Newmarket (Dilawri) for going above and beyond to make this happen during COVID. I highly recommend him to anyone from Ontario looking to buy a car. Feel free to PM him for his info. Delivery day I told the dealer beforehand to skip all exterior prep to avoid putting on swirls so the car was a bit dirty on delivery. 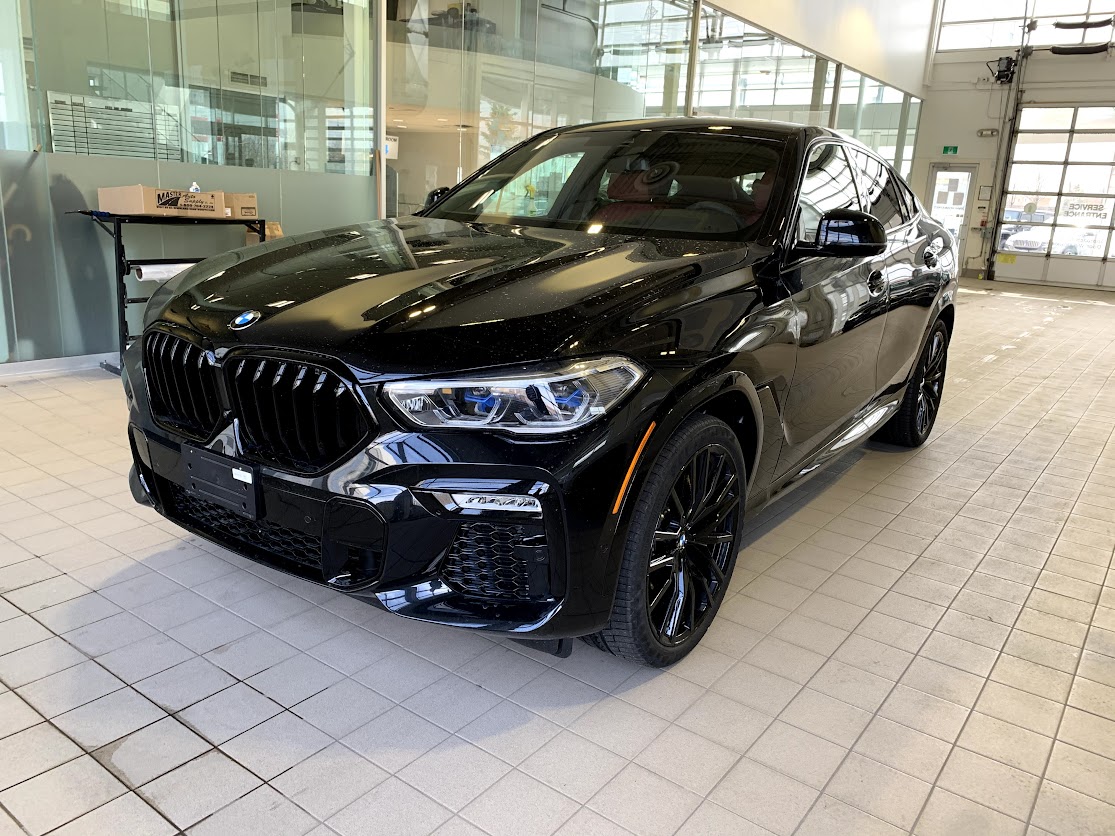  A quick photoshoot    Arrived at home Upon close inspection, there were definitely still some swirls around the car. It wasn't terrible but it was definitely noticeable enough to warrant a full polish. This was a bit puzzling to me since my sales associate triple ensured that no work was done on the exterior by the dealer. I can only assume that this happened at factory.  Two bucket wash  Yes, I had a helper    Decontamination Applied iron/tar remover  Clayed the whole car. In retrospect, it was a huge mistake to buy the Chemical Guys clay bar because it's black which makes it impossible to tell how dirty it is. I probably put on a bit more marring than necessary. Another lesson learned is that don't clay areas you don't plan on polishing.  IPA wipe as a final prep before polishing.  One stage polish I used Menzerna Super Finish 3500 on Lake Country CCS 5.5" white polishing pad with Meguiar's MT300 DA polisher. This system worked flawlessly for me. It removed all the swirls on the car in one pass. Primed the pad first with polish (only needed once per pad).  After rubbing in the polish, put three pea-sized drops for each section to be polished.  Three slow and steady overlapping, crosshatch passes with light pressure at 4500 RPM. Worked in small 2x2 sections.  Buff off polish residue with one towel and IPA wipe with another towel. IPA wipe is important in helping you accurately gauge the result of your work. I didn't do this on my previous attempts to polish other cars and it often led me to doing the same area twice or three times because I couldn't judge the first pass properly  Another key step is to brush the pad to prevent any residue from working against you.  Before:  After:  Before:  After:  Switched to 3" pad for smaller areas  Before:  After:  Before:  After:  Repeated the process until the whole car was done. At this point I was exhausted so I decided to call it a day. Ceramic Coating On the next day, I did a final IPA wipe and the car was ready for ceramic coating. I used CQuartz UK 3.0. I haven't used other products before so I can't really say how this compares to others. Application was a bit more difficult than I thought as it took a lot of effort to buff off the coating residue. I mean a LOT. I had to buff really hard to get rid of the oily haze.   FINAL RESULT     First wash (about 2 weeks) after coating. It's pretty hydrophobic as expected and water beads off nicely.  Love the mirror-like finish of clean black cars   After about 20 hours of labor, I'm pretty happy with the overall result. The only imperfections are some high spots here and there caused by me being a noob at coating. For paint correction, I'm used to working in a dark garage and relying on a bright flash light to check results. Ceramic coating requires the opposite. You need to work in a well lit area with consistent lighting to look for high spots. Once it's cured, high spots can only be removed by polishing. Sorry about the long post and I hope it's useful to someone. Any feedback on paint correction and coating technique is welcomed Last edited by justus4; 06-01-2020 at 07:57 PM.. |
|
Appreciate
9
Auricom4361.50 Gtz1wickedest646.50 GlennC321.00 AlexM51.50 MystroX56289.50 atl_1M1520.00 DCCane33.50 Cheesy Myneezy31.00 Bottom1615.50 |
| 06-01-2020, 07:59 PM | #2 |
|
Lieutenant
 276
Rep 446
Posts |
Exceptional work on the correction! The truck looks absolutely beautiful!
One note, I used CQ UK on my truck. It sounds like you may have let the solution sit on your truck too long before removing. Once you see any note of flash (rainbow) then you should be immediately buffing to remove it. Use one side of the cf towel to go over the panel, then use a second cf towel to buff. I use different colors so I know what is the product removal towel and what is the buffing towel. Once you determine flash time, it is super easy to remove. I throw away the towel after I can tell it has picked up a lot of product. You are absolutely correct that lighting is critical. For dark colors, I use higher temp lights (6k - 6.5k) to draw out high spots better. You need more of a flood versus spot and I like a higher angle on the lights so I can see them. I also use the Astro-Pneumatic 50SLMAX to inspect panels before moving on to the next. It is cheap and makes all the difference. Last note, consider Reload if you want to add to the slickness but not pull back the durability of the CQ UK. I didn't want to use Gliss because of its shorter life and Carpro seems to actually discourage it. I add Reload as a maintenance step every couple of months to keep the coating looking nice. It works exceptionally well on wheels too if you have some left over. Again, great work and the truck looks beautiful! |
|
Appreciate
0
|
| 06-02-2020, 06:18 PM | #4 | |
|
Private
56
Rep 57
Posts |
Quote:
You are absolute right that I had trouble with deciding when to buff off. It was quite cold and my garage was dark so I couldn't tell very well whether it flashed. I left it there a bit longer than the recommended 1-2 mins just to be sure that the coating has bonded. I did two coats and finished off with Reload. My arm was sore as hell after all the buffing I had some leftover but instead of coating the rims, I decided to do a little bit of A|B experiment by coating half a hood of my M4 with Cquarts and the other half with Meguiars hybrid liquid wax. I wanted to see in real life how ceramic coating compares to wax. Anyway, that's another story for another time. |
|
|
Appreciate
0
|
| 06-02-2020, 07:38 PM | #5 |
|
Major General
 6290
Rep 5,322
Posts |
Absolutely fantastic in every way. Beautiful build. I did a similar approach as my dealer is to never touch any of my new cars. I went over my carbon black X5 50i M-Sport in a long detailed process. Got the paint perfect for my products I am sponsored and chose to use. Black is a fickle color with certain products. Nothing like going over a new car to inspect any manufacturing issue.
You don’t mess around or take short cuts with black. Ended results were very rewarding. I got the 30 foot reflection that only comes with hard work and ocd. Funny enough, I just came in from my garage and ceramic coated my wheels just now. Touch-ups I found Griots 3 in 1 wax works wonders and is significantly easier to work with considering it is a ceramic. I believe this might be the most effective for wheels considering application and end gloss results. Probably going to use it on my Power Wagon tomorrow as a test. I use a detailing carnauba/beeswax for my paint work. What bothers me with ceramic is killing my microfiber towels. Most recommend not reusing these ceramic impregnated microfiber towels. That gets expensive.  Last edited by MystroX5; 06-02-2020 at 08:00 PM.. |
| 06-03-2020, 03:36 PM | #6 | |
|
Lieutenant
276
Rep 446
Posts |
Quote:
You can get cheap flood lights on a stand for $100 and be super happy. Just go with 6k - 6.5k if you are doing dark and 4k if lighter. They have switchable which is what I use. I can't believe you did that well without lightning. Amazing. |
|
|
Appreciate
0
|
| 06-03-2020, 03:38 PM | #7 | |
|
Lieutenant
276
Rep 446
Posts |
Quote:
|
|
|
Appreciate
0
|
| 06-04-2020, 04:29 AM | #8 | ||
|
Private First Class
 72
Rep 137
Posts |
Quote:
Quote:
Absolutely stunning result! I did something similar but used a temporary coating 4-6 months as I'm in the process of moving and new place has a garage so will go through whole hog there. Clay IPA wipe down Polish IPA wipe down TLC2 the last coat lasts for around 6 months. I did my sapphire black x5 and the wife's blue c class. Pics aren't great, black cars looks amazing clean. Needed something short term to stop bird poop from killing our paintwork
__________________
Now - G05
Previous - F32 |
||
| 06-04-2020, 08:51 AM | #10 |
|
Brigadier General

4362
Rep 4,246
Posts |
Forum courtesy tip, please don't quote an OP's original post when it's a lengthy article with images.
Either just reply or quote AND do the tedious job of removing the original post to the intro or specific paragraph. Nothing worse than having to re-scroll through the original post to read your reply. In this example, a reply quote repeated the OP's post twice. Yes it's as simple as swiping and flicking quickly on a mobile device or desktop, but you're doing yourself a disservice by getting your reply lost with the original post. Apologies for the morning /rant.
__________________
Current BMWs - '20 X5 xDrive40i M Sport, '20 BMW M550i | Past BMWs - '03 E39 540iT M Sport, '06 E53 4.8is, '11 E70 M Sport LCI
 |
|
Appreciate
1
edtreo88.50 |
| 06-04-2020, 06:32 PM | #12 | |
|
Private
56
Rep 57
Posts |
Quote:
|
|
|
Appreciate
0
|
| 06-04-2020, 06:38 PM | #13 | |
|
Private
56
Rep 57
Posts |
Quote:
|
|
|
Appreciate
0
|
| 06-04-2020, 06:54 PM | #14 | |
|
Major General
6290
Rep 5,322
Posts |
Quote:
Just be careful of pressure washers and any sensors on the vehicle. I have seen them get toasted with water intrusion in a matter of seconds. I have also seen some nightmares that didnt show up until later with the use of pressure washers. |
|
|
Appreciate
1
justus455.50 |
| 06-04-2020, 07:10 PM | #15 | |
|
Lieutenant
276
Rep 446
Posts |
Quote:
|
|
|
Appreciate
0
|
| 06-04-2020, 07:12 PM | #16 | |
|
Lieutenant
276
Rep 446
Posts |
Quote:
Last edited by 130FeetDeep; 06-05-2020 at 10:05 AM.. Reason: Spelling |
|
|
Appreciate
0
|
| 06-05-2020, 02:11 AM | #17 |
|
Private First Class
72
Rep 137
Posts |
The guy at the dealership admitted he went over the car after it had rained as he didn't want to present me a wet car.
In doing so, he put a butt loads of swirl marks in the car at handover. Dealership rectified it with a full machine polish
__________________
Now - G05
Previous - F32 |
|
Appreciate
0
|
| 06-05-2020, 10:06 AM | #18 | |
|
Lieutenant
276
Rep 446
Posts |
Quote:
|
|
|
Appreciate
0
|
| 06-06-2020, 10:41 AM | #20 |
|
Major General
6290
Rep 5,322
Posts |
Most of the paint damage comes from the dealer right after removing the white plastic shipping film. The white film will leave a slight amount of residue and the dealer scrubs too hard with a dirty wash mitt and now we have paint correction work to do right off the dealers lot.
|
|
Appreciate
0
|
Post Reply |
| Bookmarks |
|
|